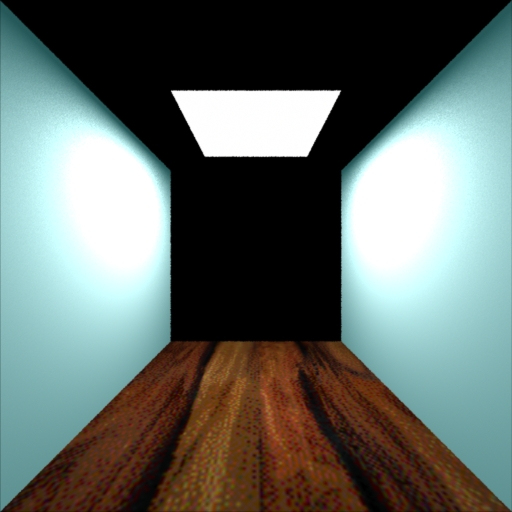
This should be straightforward. If SLIDE crashes with this simple file, there is something wrong with your SLIDE installation (esp. on Win32). Try re-installing SLIDE. This is the RIB file I get after saving the scene as RIB from SLIDE.
You should first make a ".tif" file from the texture image file - any program like GIMP, PhotoShop, MS Image Viewer will do (remember to save as a 24 bit image). Then, you should convert the TIFF file to a ".tx" format (for those who care - this does mipmapping). This isn't absolutely necessary (i.e. both BMRT and Pixie will accept raw TIFF files as well), but will give you better texture quality and performance.
On BMRT, you use the 'mkmip' command. On Pixie, use 'texmake'.
Using BMRT, you should be able to invoke the renderer on the RIB file generated by SLIDE, without modifying it. Use the 'rendrib' command. You should get something like this:
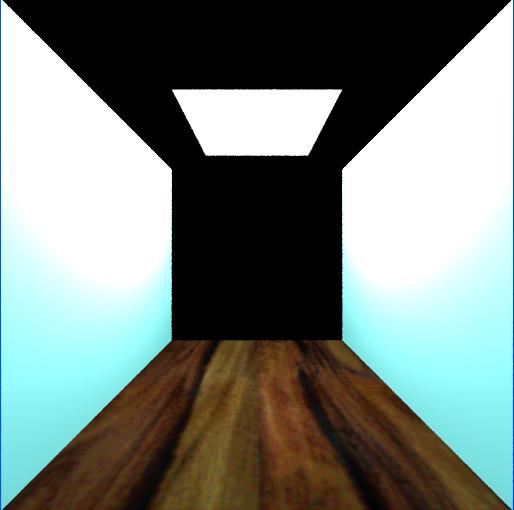
For Pixie, you'll notice that simply running Pixieto render the RIB file produced in step1 will only render the light and nothing else. This is because Pixie does not support area light sources. You should manually modify the light type to something Pixie can support (like a point light, say). This is the RIB file that works with Pixie. After rendering this file with Pixie (with the 'rndr' command), you get something like this:
If you inspect the RIB files, you'll see several 'Surface' commands with names like 'plastic', 'paintedplastic', 'constant' etc. in them. You are already using shaders! The names that follow the 'Surface' commands (i.e. plastic etc.) are the names of the shaders and everything that follows the shader name are name-value attribute pairs. That is, if you see something like "Ka" [1] , it means we're passing 1 as the value of the ambient component to the shader. If you don't have any arguments after the shader name, the shader will use default values. To see the default values of a shader, open the corresponding shader file (these are the *.sl files in the 'examples' directory for BMRT and 'shaders' for Pixie).
Obviously the scene above needs improvement. You can experiment with different shaders to find one that matches your requirements. Also, once you identify the shader, you should understand the parameters it takes so you can play around with those values as well.
Now, for no particular reason, let's make one of the side walls out of shiny metal. Also, since more of you have had trouble with Pixie, we'll modify the Pixie RIB file. This is the modified RIB file. Notice the 'Surface "metal"' command just before the geometry for the left wall is specified. Also note that the surface attribute needs to be enclosed with corresponding "AttributeBegin" and "AttributeEnd" tags. After rendering this with Pixie, this is what you should get:
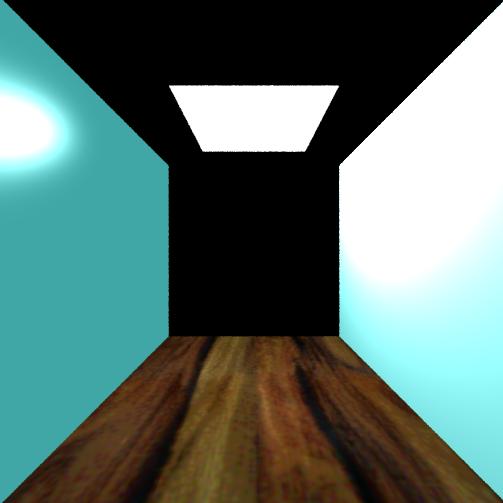
Ok, so granted this looks even uglier than the earlier image, but the point is we were able to modify the shader without much work. Now, the hard part is figuring out the exact lighting conditions and correct parameters for a shader so this looks good. That's up to you!
Again, for no good reason, I decided I want the left wall to be made out of glass instead. So, I use the glass shader; this is the modified RIB file.
After rendering it using BMRT, this is what you should get:
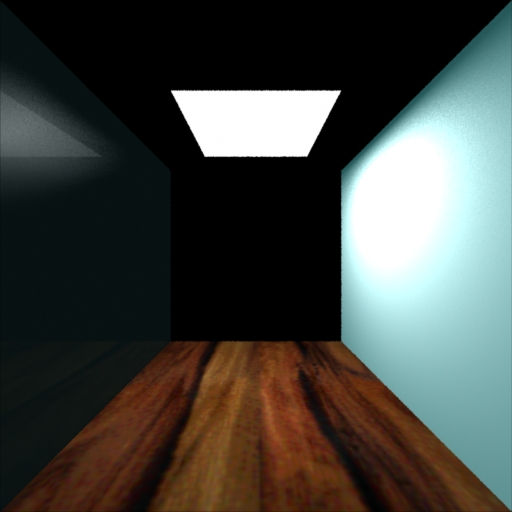
Notice the reflection of the light and floor on the left wall.
This is where you take into account inter-object occlusion (i.e. generating shadows).
You will need to do this for Pixie; you modify two things:
(1) RIB file (add the Attribute "visibility" tags)
(2)Shader file (the illuminate(from) part).
After this, you will also have gained some very useful insight into modifying shaders.
Of course, the scene above doesn't really need any shadow generation, but if you're using Pixie, you should do this step - without soft shadows, your scene will never look photorealistic, and you'll lose points.
You should play around (in SLIDE) with different types of lights - last week we discussed how for an outdoors shot, you would need directional light and for an indoors shot, you'll need a spot or point light.
Play around with anti-aliasing (sampling more than once per pixel), radiosity etc. These things take time to render, so do this step last.