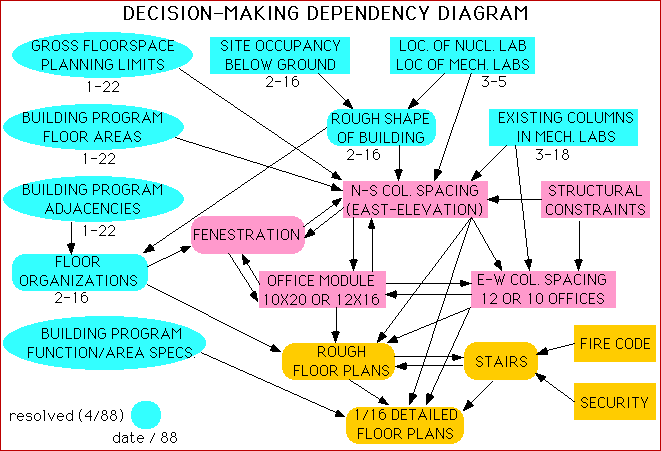
In April of 1988, the design of Soda hall seemed to get stuck. The blue issues had been decided and were accepted by all parties. But the column grid designed by the structural engineers did not fit well with the fenestrations desired by the architects or with the office sizes desired by the client. Whenever two parties got together and found a good solution for them, the other parties were unhappy about the new constraints. This deadlock could not be resolved until representatives of ALL the parties involved were brought together at once to hammer out a compromise solution that was acceptable to all parties.
The Decision diagram shows this problem area as a fully connected cluster of brown boxes in the center.
A second problem cluster is shown in lighter color in the bottom right corner of the diagram.